Contents
Planning Your Pergola Design
Before a single tool is picked up, the key to a successful pergola project lies in thorough planning. Consider the purpose of your pergola. Do you dream of evening dinners beneath the stars, or a shaded area for afternoon lounging? Next, determine the best location in your yard. It should complement your home’s design and fit seamlessly with the landscape. Lastly, decide on the size. A pergola too small loses its functionality, while one too large might overwhelm your space. This initial step sets the stage for a successful build.
Also, don’t forget to check for any local building codes and permits you might need. Compliance with local regulations ensures your project proceeds smoothly, without any legal hiccups. Knowing this information upfront saves time and stress, ensuring that the installation process goes as expected.
Choosing Your Wood and Materials
Selecting the right wood is crucial for your pergola’s longevity and appearance. Cedar and redwood are excellent choices for their natural resistance to rot, decay, and insects. These materials promise longevity and require less maintenance, making them ideal for your outdoor structure. Moreover, consider the hardware and fasteners that will be used. Opting for stainless steel or coated options that resist rust will ensure your pergola’s structural integrity over time.
Beyond wood and fasteners, you’ll need tools for the job. Commonly required tools include a circular saw, drill, level, measuring tape, and perhaps a post-hole digger. Gathering your materials and tools before starting ensures a smooth workflow, preventing unnecessary pauses in construction.
Preparing the Site
Groundwork preparation is the next step. This phase involves clearing the area where the pergola will stand. Remove any sod, rocks, or debris to create a level foundation. It’s also a great time to plan for any landscape or hardscape changes that complement your new pergola. Adjusting these features beforehand integrates your pergola beautifully with its surroundings.
If you’re installing on an existing patio or deck, ensure the structure can support the pergola’s weight. For installations directly on the ground, consider the type of foundation—whether you’ll use concrete footings or secure post bases to the ground directly. The right foundation choice depends on your pergola’s size and design, as well as the soil conditions of your yard.
Setting the Posts
The structural integrity of your pergola starts with correctly setting the posts. Mark the post locations according to your design plans, ensuring they are evenly spaced and square to each other. If using concrete footings, dig holes to the recommended depth for your area—usually at least 24 inches to account for frost lines. Secure post bases in the concrete, or directly embed the posts, ensuring they are perfectly vertical using a level.
Allow sufficient time for the concrete to cure if that’s part of your installation. This might take several days, but it’s crucial for providing a stable foundation for your pergola. Patience during this step pays off with a sturdy, long-lasting structure.
Installing the Beams and Crossbeams
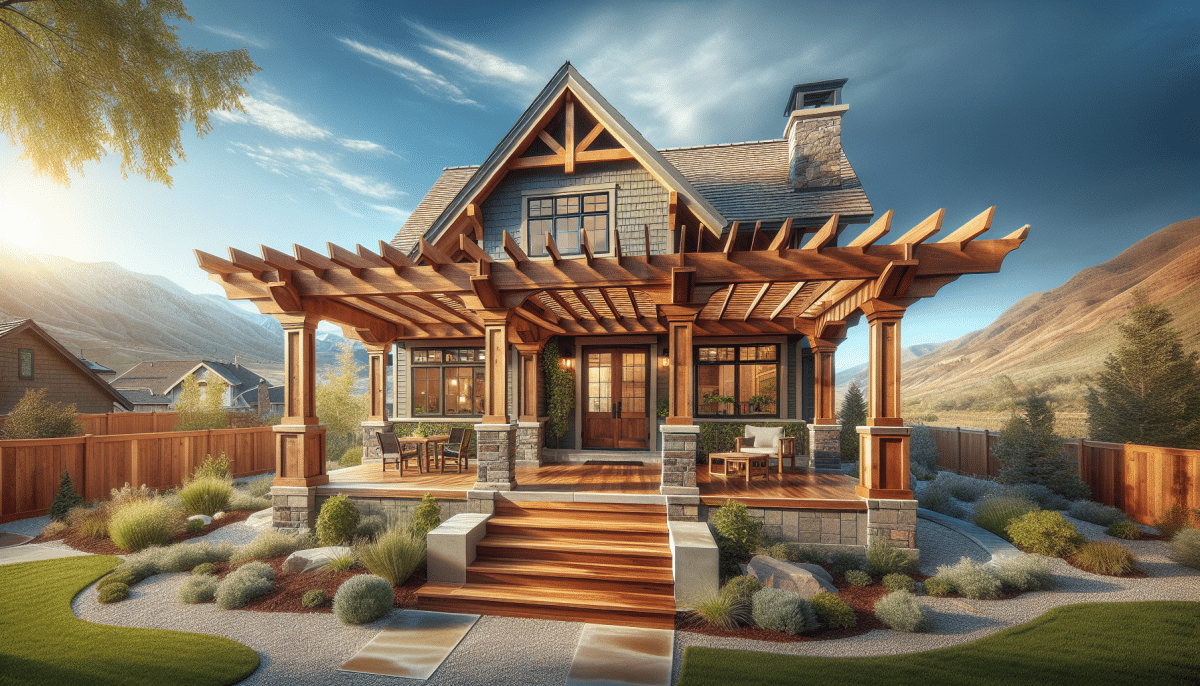
With the posts in place, the next step is to attach the horizontal beams that form the pergola’s backbone. These beams should be installed at the top of your posts and securely fastened using the appropriate hardware. Ensure they are level and equally overhang the posts on each side for a balanced look.
After the main beams are secure, you can add the crossbeams. These are typically spaced evenly across the top of your beams and may be notched to fit securely into place. Not only do they add structural stability, but the crossbeams also create the classic pergola lattice that offers partial shade.
Adding the Rafters
The rafters form the uppermost layer of your pergola, sitting atop the crossbeams. Like the beams and crossbeams, rafters should be spaced evenly and secured properly. Depending on your design, the rafters can run parallel to the house for a traditional look or perpendicular for a more modern aesthetic. This layer further enhances the shade provided by your pergola and adds to its visual appeal.
As you install the rafters, ensure they are of uniform size and evenly spaced. This not only contributes to the pergola’s aesthetics but also its balance and structural integrity. Moreover, consider the direction of the sun when deciding on the spacing of the rafters to maximize shade during the hottest parts of the day.
Customizing Your Pergola
Once the basic structure is complete, you can add custom touches to make your pergola truly yours. Consider incorporating climbing plants or vines for a natural, integrated look. These can be planted at the base of the posts and guided up to create a living canopy over time. Alternatively, adding string lights or lanterns can create a cozy ambiance for evening gatherings.
Other customization options include hanging planters, installing retractable shades, or adding side panels for additional privacy or wind protection. These personal touches turn a standard pergola into a personalized retreat, reflecting your style and enhancing your outdoor living experience.
Finishing Touches
Applying a finish to your wood pergola not only increases its beauty but also enhances its durability. A clear wood preservative, stain, or paint can protect against weather elements, UV rays, and general wear and tear. When choosing a finish, consider the existing Colors and materials in your outdoor space to create a cohesive look.
Remember, regular maintenance extends the life of your pergola. Annual inspections and touch-ups to any chipped paint or stain, tightening of loose hardware, and replacement of any worn parts keep your pergola safe and looking its best. With proper care, your pergola can be an enduring feature of your home.
Maintenance and Care
- Annual Inspections: Check your pergola each year for signs of wear or damage. Catching issues early can prevent them from becoming major problems.
- Cleaning: A mild soap and water solution can remove dirt and grime. For tougher stains, a soft-bristled brush may be necessary.
- Reapply Finish: Depending on your climate and the type of finish used, you may need to reapply a protective coating every few years to maintain its appearance and durability.
- Check for Pests: Insects can do significant damage. Regularly inspect wood components, especially if you used materials other than cedar or redwood, which are more resistant to pests.
- Hardware Check: Over time, hardware can loosen. Annually tightening screws and bolts ensures the structural integrity of your pergola remains solid.
Conclusion
Building a wood pergola is an enriching project that enhances your outdoor living space, providing beauty and comfort for years to come. By following this step-by-step guide, you’re well on your way to creating a stunning focal point in your backyard. For any questions, or to get started on your pergola project, call us today at 801-784-6082 or Request a Free Quote. Remember, whether doing it yourself or overseeing the work, Utah Pergola Company is here to help every step of the way.


